The new Goshawk is a pack that I would say is “sitting nicely in the sweet spot”. It has enough capacity (4800 Cubic Inches) to stuff a week’s worth of adventure gear in while remaining small enough so one can maneuver through thick brush, tight rock walls, or under low hanging branches. Add a Top Lid and get an extra compartment to throw in gear you need easy access to and for me it’s a no brainer.
These are some reasons why I will be throwing the Goshawk with Lid on my back this year.
- XPAC Fabric:
A lot of buzz is going around about XPAC currently and for good reason. It’s rainproof and after you seal the seams, which I plan to do when I get some free time out of the office, it’s waterproof if submersed for a period of time.
- The Revolution Frame:
On my list of activities I partake in throughout the year hunting is at the top, and for most hunters they can easily get behind a breakaway frame. The Seek Outside Revolution Frame system is what is known as a breakaway bag system, meaning the bag can be detached from the frame either completely or partially. Pictured below is an example of a load being carried in between the Goshawk bag.
This is helpful for hunters as we can carry meat close to our backs, which allows for greater weight distribution in the right areas. My knees appreciate it.
Beyond hunting and meat carry the breakaway bag system allows one to carry odd-shaped heavier items with better compression because you are using the surface area of the Goshawk as part of the compression. Perfect for dry bags, coolers, or kegs.
- The Top Lid Configuration:
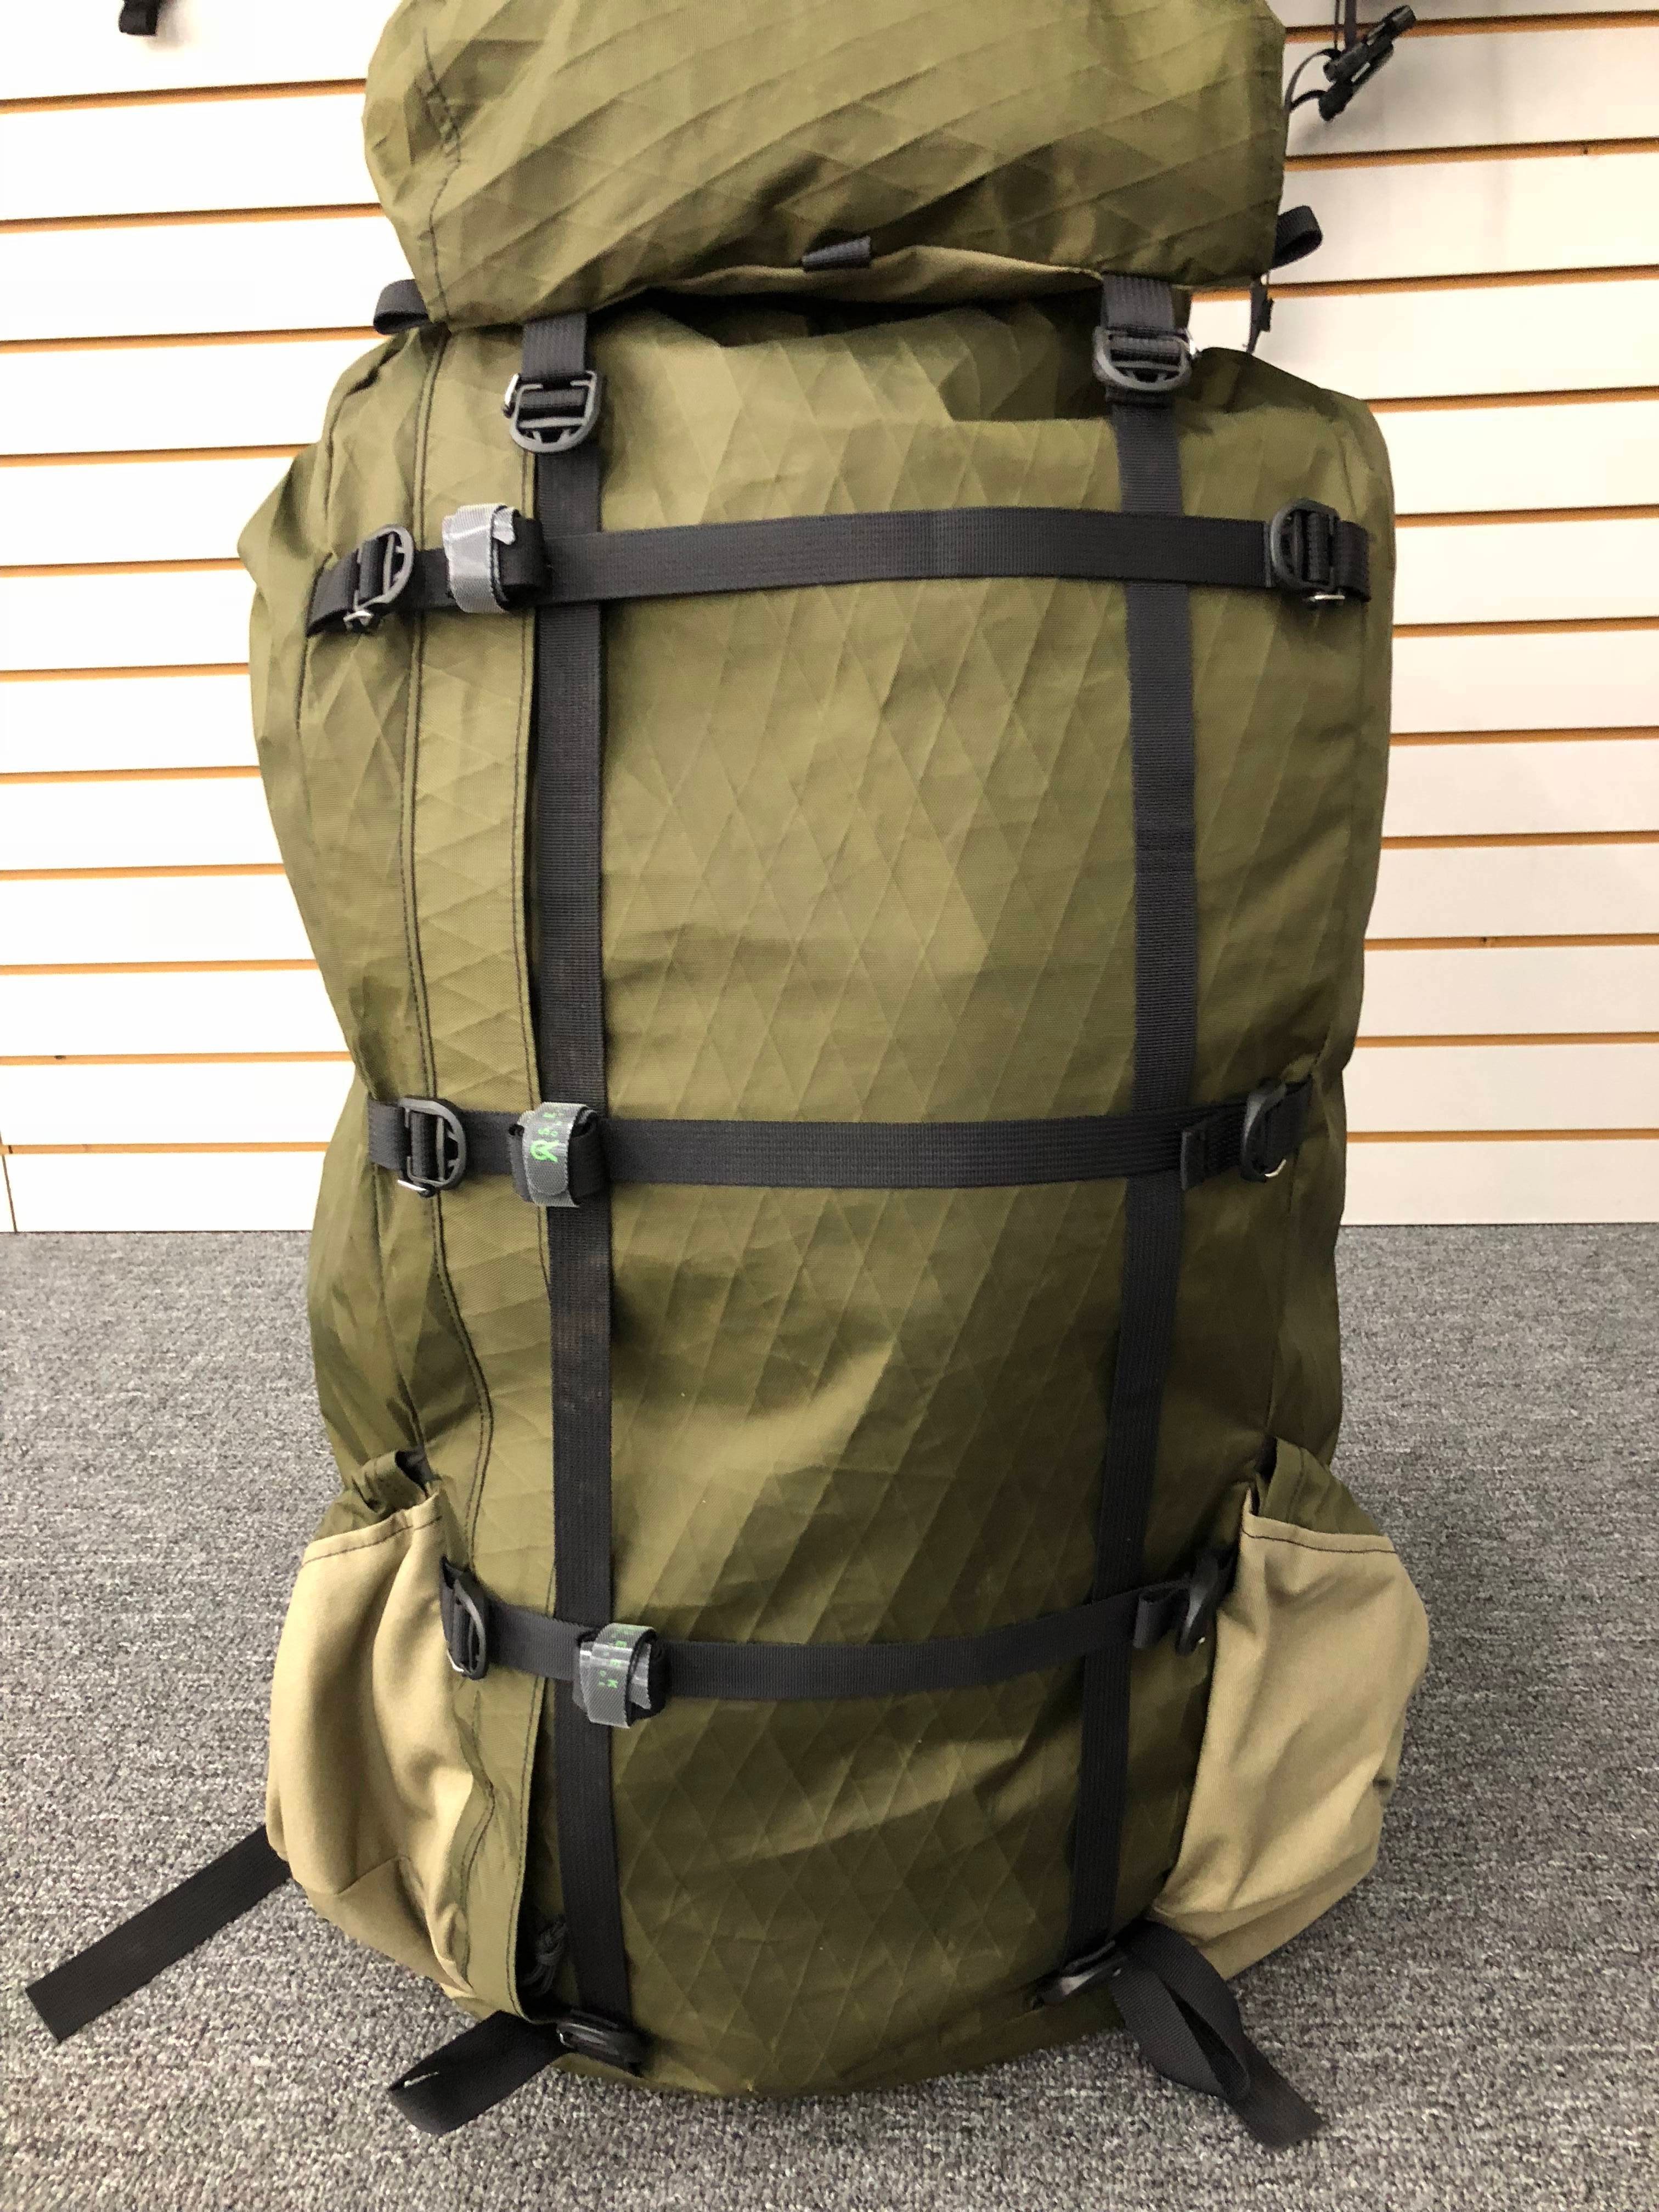
There are a few different ways you can configure the Top Lid onto the Goshawk. One is by using gatekeeper compression straps to redirect the top loops on each side of the bag’s face up to the loops either on the bottom or side of lid. However, I like another way wich gives me an additional feature within the two components.
I’ll take you through the steps.
- I attach the Top Lid to the top loops on the frame like normal.
- I then attach a 26 inch compression strap on both bottom loops of the lid and run the other end of the strap down to the bottom loops on the bag.
- Then run 26 inch compression straps across the loops on the face of the bag. You will use three straps and should see a cross section of straps forming.
I like this setup because it provides me an additional area on the face of the bag to carry large, oddly shaped items that need a lot of compression points like sheds, wet clothes that need drying, a rifle or bow, or maybe even a game bag full of boned out meat if I’ve already filled the space in the breakaway area.
Besides compressing loads with the straps this configuration allows me to hit all the points of compression on the bag itself and its contents. I can use the face compression to keep all my items inside the bag close to the frame, keeping them from falling away from my center of gravity. The vertical compression straps aid in the same as the horizontal but also keep the bag’s contents from settling deep in the bottom of the bag. This all helps me keep the load and weight exactly where I want it to be. Thus, allowing me to carry heavier loads and saving parts of my body from taking too much of a beating while moving over backcountry terrain.