How To Seam Seal A Tent
How to seam seal a tent:
Sealing one of our tipis or backpacking tents can be done quickly, effectively, and with little mess.
Our seams are flat felled, meaning the fabric is folded over itself in a particular way before being stitched. This type of seam is very water resistant, and in our testing the seams generally don't leak. However, anything sewn into these seams can wick water through to the inside.
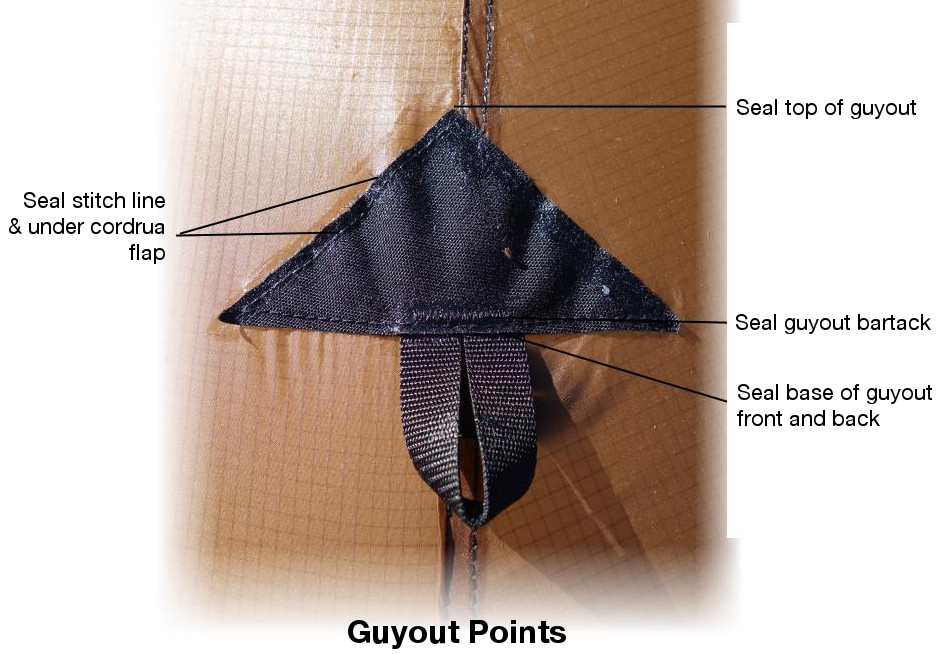
We recommend sealing the exterior seams (the double lines of stitching), but it is more important to do a good job of sealing door tiebacks, hang loops, and guyout points.
To seal, simply run a small bead of sealant along the seams, then rub into the seam with a finger.
Alternatively you can use an acid brush to apply the sealant, but it goes quicker with just a finger. Remember to stretch seams tight before sealing.
Areas to cover:
- Exterior seams
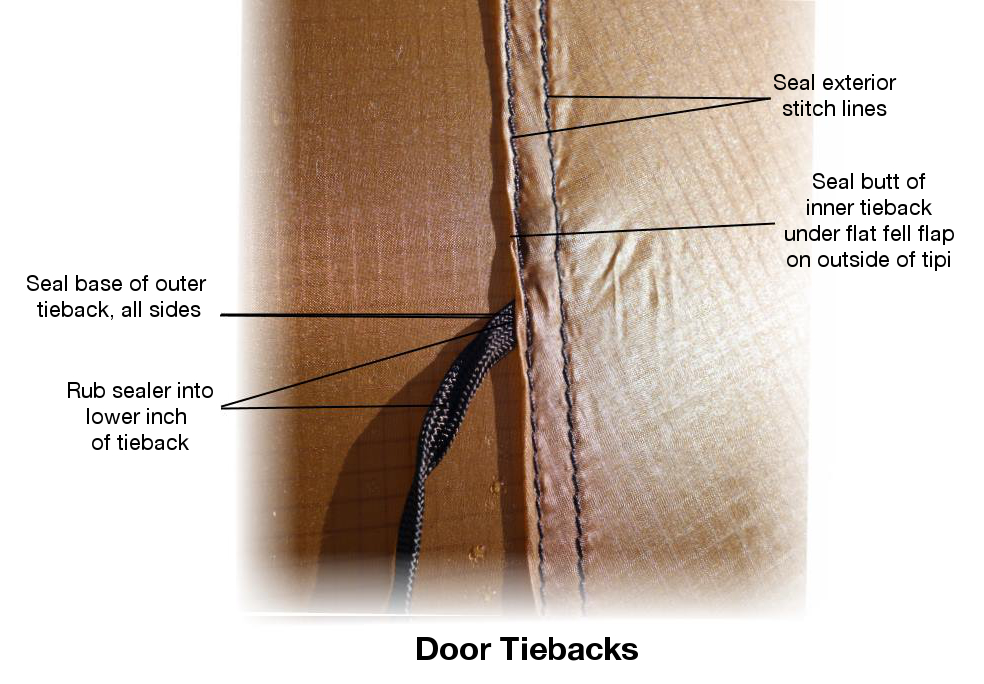
- Outer door tiebacks
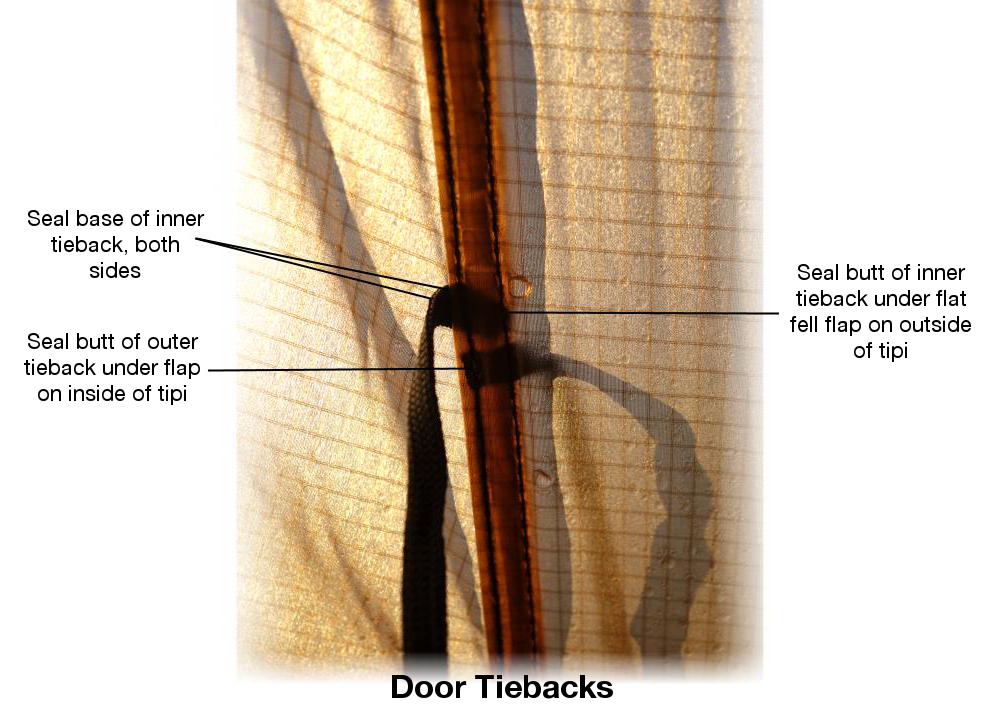
- Inner door tiebacks
- Inner hang loops
- Outer guyout points
- Cone
- Stovejack
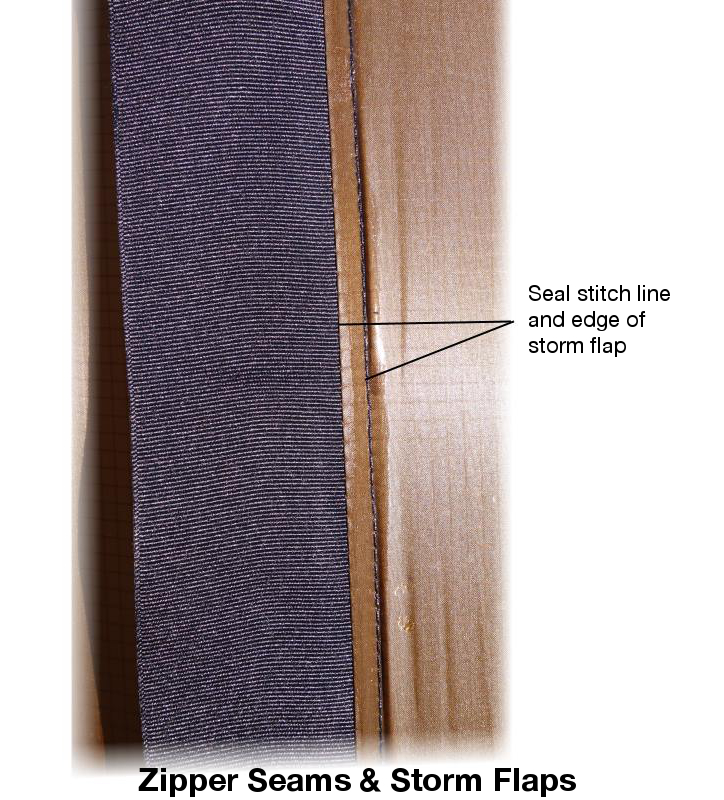
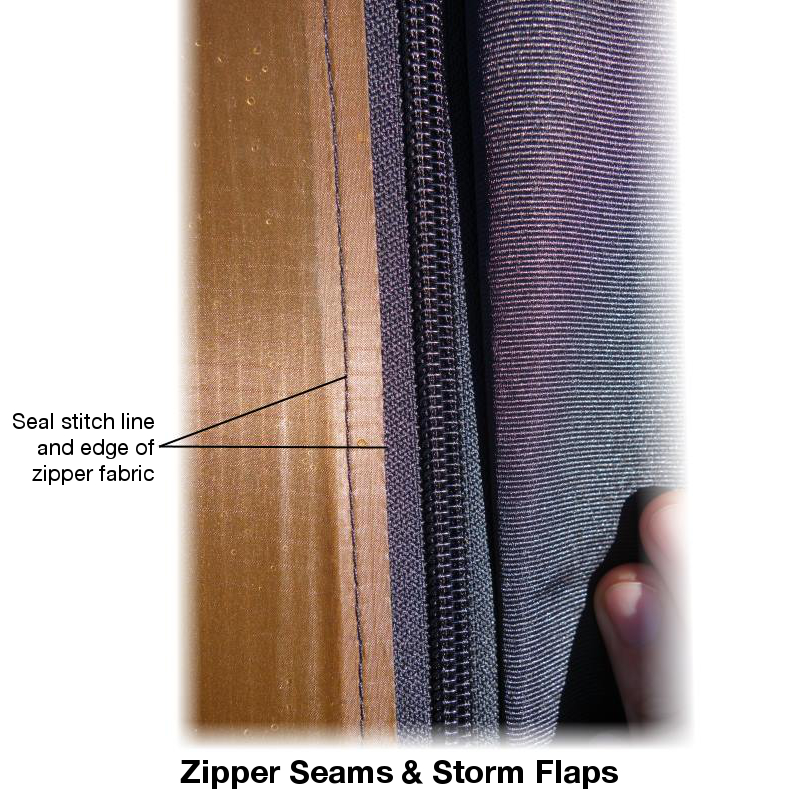
- Zippers
SEAM SEALING STEPS
1. Exterior Seams: Seal the outer seams - on smaller shelters the size of a 4 Person and smaller, pitch the shelter normally and seal the seams. On large shelters it helps to pitch the tipi inside out in order to reach all the seams.
2. Outer door tiebacks:
3. Inner Door Tiebacks:
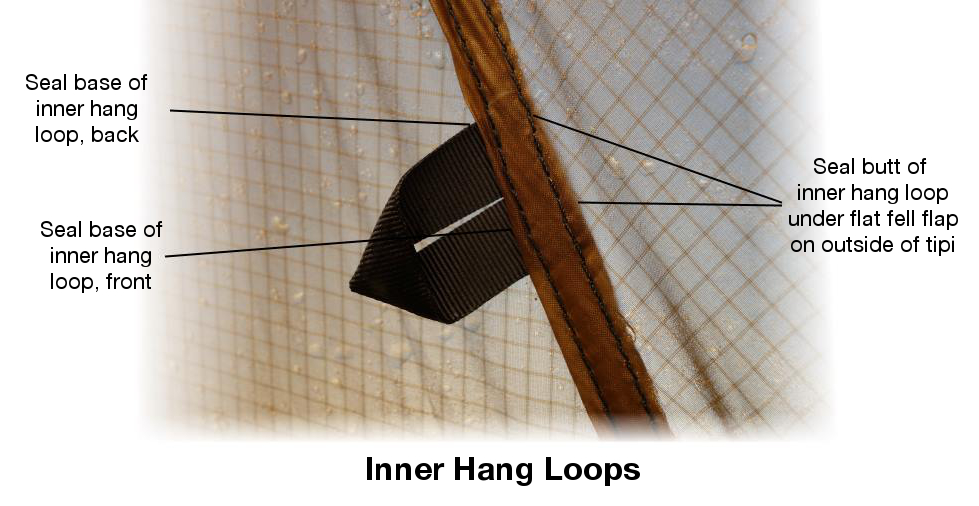
4. Inner Hang Loops: Seal the butt of the inner hang loops under the flat fell flap on the outside of the tipi, then seal all sides of the base on the inside of the tipi.
5. Outer Guyout Points:
6: Cone: The cone may be the easiest part of the shelter to seal. The cone itself is waterproof, just cover the seam, the hang loop, and the stitching on the labels.
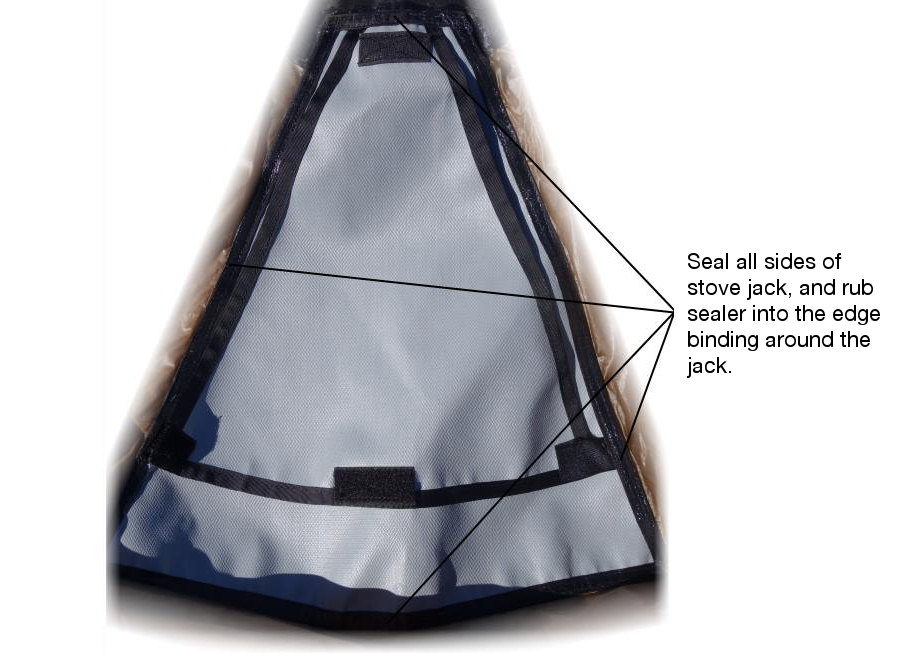
7: Stove Jack:
8. Zippers: If you plan on high occupancy and people will be sleeping under the zippers then seal them inside and out. Extremely wet weather and heavy rain can soak into the zipper material itself.
